Showing posts with label Websocket. Show all posts

Saturday, May 28, 2016

Cloud Foundry Java Client - Streaming events

Cloud Foundry Java Client provides Java based bindings for interacting with a running Cloud Foundry instance. One of the neat things about this project is that it has embraced the Reactive Stream based API's for its method signatures, specifically using the Reactor implementation, this is especially useful when consuming streaming data.

In this post I want to demonstrate a specific use case where this library really shines - in streaming events from Cloud Foundry

Loggregator is the subsystem in Cloud Foundry responsible for aggregating all the logs produced within the system and provides ways for this information to be streamed out to external systems. The "Traffic Controller" component within Loggregator exposes a Websocket based endpoint streaming out these events, the Cloud Foundry Java client abstracts the underlying websocket client connection details and provides a neat way to consume this information.


As a pre-requisite, you will need a running instance of Cloud Foundry to try out the sample and the best way to get it working locally is to use PCF Dev.

Assuming that you have a running instance, the way to connect to this instance from code using the cf-java-client library is along the following lines:

SpringCloudFoundryClient cfClient = SpringCloudFoundryClient.builder()
                .host("api.local.pcfdev.io")
                .username("admin")
                .password("admin")
                .skipSslValidation(true)
                .build();

Using this, a client to the Traffic Controller can be created the following way:

DopplerClient dopplerClient = ReactorDopplerClient.builder()
      .cloudFoundryClient(cfClient)
      .build();


That is essentially it, doppler client provides methods to stream the underlying events, if you are interested in all the unfiltered information(appropriately referred to as the firehose), you can do it the following way:

Flux<Event> cfEvents = this.dopplerClient.firehose(
    FirehoseRequest.builder()
      .subscriptionId(UUID.randomUUID().toString()).build());

The result is a Flux type from the Reactor library encapsulating the streaming data which can be observed by attaching a subscriber, say for a basic example of a subscriber simply logging the events to the console the following way:

cfEvents.subscribe(e -> LOGGER.info(e.toString()));


However the real power of Flux is in the very powerful fluent methods that it provides, so for eg if I were interested in a subset of say just the Application level logs, I would essentially want to filter down the data, extract the log from it and print the log the following way:

cfEvents
 .filter(e -> LogMessage.class.isInstance(e))
 .map(e -> (LogMessage)e)
 .map(LogMessage::getMessage)
 .subscribe(LOGGER::info);

If you want to play with this sample which as an added bonus has been Spring Boot enabled, I have it available in my github repository.

Tuesday, November 11, 2014

Spring boot war packaging

Spring boot recommends creating an executable jar with an embedded container(tomcat or jetty) during build time and using this executable jar as a standalone process at runtime. It is common however to deploy applications to an external container instead and Spring boot provides packaging the applications as a war specifically for this kind of a need.

My focus here is not to repeat the already detailed Spring Boot instructions on creating the war artifact, but on testing the created file to see if it would reliably work on a standalone container. I recently had an issue when creating a war from a Spring Boot project and deploying it on Jetty and this is essentially a learning from that experience.

The best way to test if the war will work reliably will be to simply use the jetty-maven and/or the tomcat maven plugin, with the following entries to the pom.xml file:

<plugin>
 <groupId>org.apache.tomcat.maven</groupId>
 <artifactId>tomcat7-maven-plugin</artifactId>
 <version>2.2</version>
</plugin>
<plugin>
 <groupId>org.eclipse.jetty</groupId>
 <artifactId>jetty-maven-plugin</artifactId>
 <version>9.2.3.v20140905</version>
</plugin>

With the plugins in place, starting up the war with the tomcat plugin:
mvn tomcat7:run

and with the jetty plugin:
mvn jetty:run

If there any issues with the way the war has been created, it should come out at start-up time with these containers. For eg, if I were to leave in the embedded tomcat dependencies:

<dependency>
 <groupId>org.springframework.boot</groupId>
 <artifactId>spring-boot-starter-tomcat</artifactId>
</dependency> 

then when starting up the maven tomcat plugin, an error along these lines will show up:
java.lang.ClassCastException: org.springframework.web.SpringServletContainerInitializer cannot be cast to javax.servlet.ServletContainerInitializer

an indication of a servlet jar being packaged with the war file, fixed by specifying the scope as provided in the maven dependencies:
<dependency>
 <groupId>org.springframework.boot</groupId>
 <artifactId>spring-boot-starter-tomcat</artifactId>
 <scope>provided</scope>
</dependency> 

why both jetty and tomcat plugins, the reason is I saw a difference in behavior specifically with websocket support with jetty as the runtime and not in tomcat. So consider the websocket dependencies which are pulled in the following way:
<dependency>
 <groupId>org.springframework.boot</groupId>
 <artifactId>spring-boot-starter-websocket</artifactId>
</dependency> 

This gave me an error when started up using the jetty runtime, and the fix again is to mark the underlying tomcat dependencies as provided, replace above with the following:

<dependency>
 <groupId>org.springframework</groupId>
 <artifactId>spring-websocket</artifactId>
</dependency>
<dependency>
 <groupId>org.apache.tomcat.embed</groupId>
 <artifactId>tomcat-embed-websocket</artifactId>
 <scope>provided</scope>
</dependency>
<dependency>
 <groupId>org.springframework</groupId>
 <artifactId>spring-messaging</artifactId>
</dependency>

So to conclude, a quick way to verify if the war file produced for a Spring-boot application will cleanly deploy to a container(atleast tomcat and jetty) is to add the tomcat and jetty maven plugins and use these plugins to start the application up. Here is a sample project demonstrating this - https://github.com/bijukunjummen/spring-websocket-chat-sample.git

Wednesday, November 5, 2014

Spring boot based websocket application and capturing http session id

I was involved in a project recently where we needed to capture the http session id for a websocket request - the reason was to determine the number of websocket sessions utilizing the same underlying http session

The way to do this is based on a sample utilizing the new spring-session module and is described here.

The trick to capturing the http session id is in understanding that before a websocket connection is established between the browser and the server, there is a handshake phase negotiated over http and the session id is passed to the server during this handshake phase.

Spring Websocket support provides a nice way to register a HandShakeInterceptor, which can be used to capture the http session id and set this in the sub-protocol(typically STOMP) headers. First, this is the way to capture the session id and set it to a header:

public class HttpSessionIdHandshakeInterceptor implements HandshakeInterceptor {

 @Override
 public boolean beforeHandshake(ServerHttpRequest request, ServerHttpResponse response, WebSocketHandler wsHandler, Map<String, Object> attributes) throws Exception {
  if (request instanceof ServletServerHttpRequest) {
   ServletServerHttpRequest servletRequest = (ServletServerHttpRequest) request;
   HttpSession session = servletRequest.getServletRequest().getSession(false);
   if (session != null) {
    attributes.put("HTTPSESSIONID", session.getId());
   }
  }
  return true;
 }

 public void afterHandshake(ServerHttpRequest request, ServerHttpResponse response, WebSocketHandler wsHandler, Exception ex) {
 }
}

And to register this HandshakeInterceptor with Spring Websocket support:

@Configuration
@EnableWebSocketMessageBroker
public class WebSocketDefaultConfig extends AbstractWebSocketMessageBrokerConfigurer {

 @Override
 public void configureMessageBroker(MessageBrokerRegistry config) {
  config.enableSimpleBroker("/topic/", "/queue/");
  config.setApplicationDestinationPrefixes("/app");
 }

 @Override
 public void registerStompEndpoints(StompEndpointRegistry registry) {
  registry.addEndpoint("/chat").withSockJS().setInterceptors(httpSessionIdHandshakeInterceptor());
 }

 @Bean
 public HttpSessionIdHandshakeInterceptor httpSessionIdHandshakeInterceptor() {
  return new HttpSessionIdHandshakeInterceptor();
 }

}

Now that the session id is a part of the STOMP headers, this can be grabbed as a STOMP header, the following is a sample where it is being grabbed when subscriptions are registered to the server:

@Component
public class StompSubscribeEventListener implements ApplicationListener<SessionSubscribeEvent> {

 private static final Logger logger = LoggerFactory.getLogger(StompSubscribeEventListener.class);

 @Override
 public void onApplicationEvent(SessionSubscribeEvent sessionSubscribeEvent) {
  StompHeaderAccessor headerAccessor = StompHeaderAccessor.wrap(sessionSubscribeEvent.getMessage());
  logger.info(headerAccessor.getSessionAttributes().get("HTTPSESSIONID").toString());
 }
}

or it can be grabbed from a controller method handling websocket messages as a MessageHeaders parameter:

@MessageMapping("/chats/{chatRoomId}")
 public void handleChat(@Payload ChatMessage message, @DestinationVariable("chatRoomId") String chatRoomId, MessageHeaders messageHeaders, Principal user) {
  logger.info(messageHeaders.toString());
  this.simpMessagingTemplate.convertAndSend("/topic/chats." + chatRoomId, "[" + getTimestamp() + "]:" + user.getName() + ":" + message.getMessage());
 }

Here is a complete working sample which implements this pattern.

Saturday, July 19, 2014

Tailing a file - Spring Websocket sample

This is a sample that I have wanted to try for sometime - A Websocket application to tail the contents of a file.


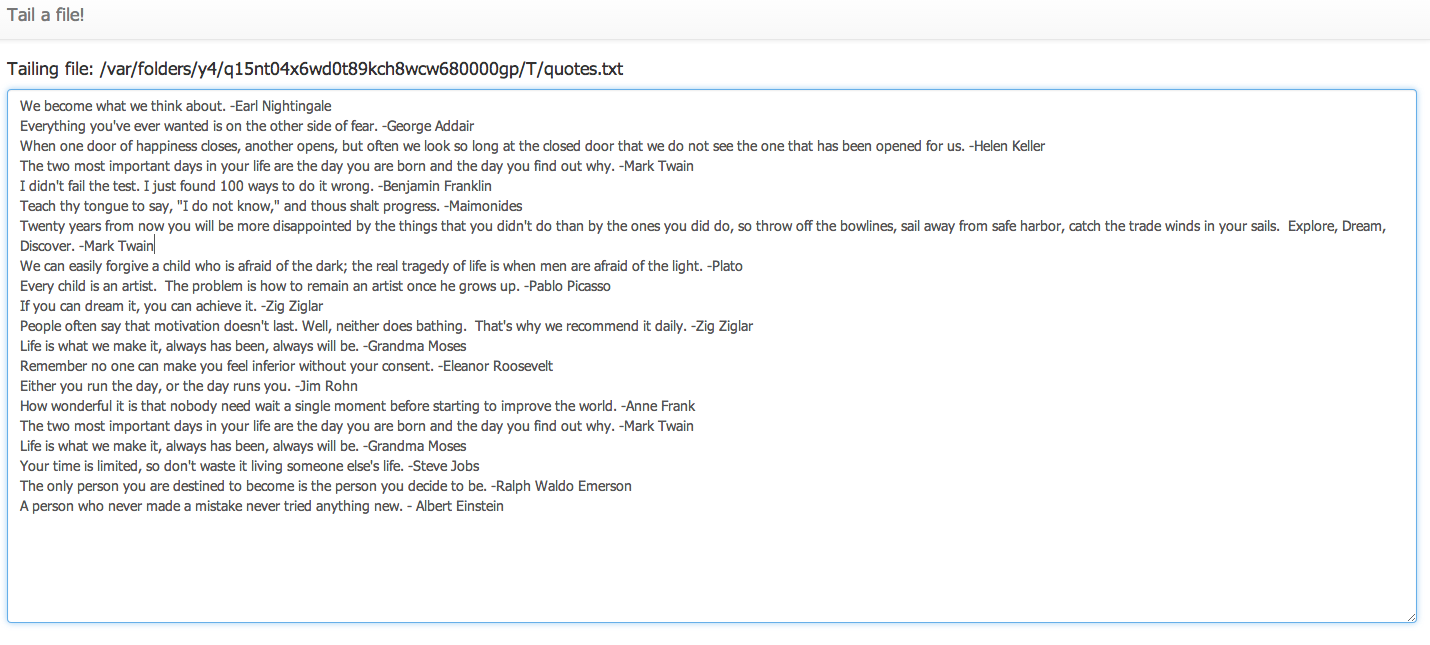
The following is the final view of the web-application:


There are a few parts to this application:

Generating a File to tail:


I chose to use a set of 100 random quotes as a source of the file content, every few seconds the application generates a quote and writes this quote to the temporary file. Spring Integration is used for wiring this flow for writing the contents to the file:

<int:channel id="toFileChannel"/>

<int:inbound-channel-adapter ref="randomQuoteGenerator" method="generateQuote" channel="toFileChannel">
	<int:poller fixed-delay="2000"/>
</int:inbound-channel-adapter>

<int:chain input-channel="toFileChannel">
	<int:header-enricher>
		<int:header name="file_name" value="quotes.txt"/>
	</int:header-enricher>
	<int-file:outbound-channel-adapter directory="#{systemProperties['java.io.tmpdir']}" mode="APPEND" />
</int:chain>

Just a quick note, Spring Integration flows can now also be written using a Java Based DSL, and this flow using Java is available here

Tailing the file and sending the content to a broker


The actual tailing of the file itself can be accomplished by OS specific tail command or by using a library like Apache Commons IO. Again in my case I decided to use Spring Integration which provides Inbound channel adapters to tail a file purely using configuration, this flow looks like this:
<int:channel id="toTopicChannel"/>

<int-file:tail-inbound-channel-adapter id="fileInboundChannelAdapter"
				channel="toTopicChannel"
				file="#{systemProperties['java.io.tmpdir']}/quotes.txt"
				delay="2000"
				file-delay="10000"/>

<int:outbound-channel-adapter ref="fileContentRecordingService" method="sendLinesToTopic" channel="toTopicChannel"/>
and its working Java equivalent

There is a reference to a "fileContentRecordingService" above, this is the component which will direct the lines of the file to a place where the Websocket client will subscribe to.

Websocket server configuration

Spring Websocket support makes it super simple to write a Websocket based application, in this instance the entire working configuration is the following:
@Configuration
@EnableWebSocketMessageBroker
public class WebSocketDefaultConfig extends AbstractWebSocketMessageBrokerConfigurer {

	@Override
	public void configureMessageBroker(MessageBrokerRegistry config) {
		//config.enableStompBrokerRelay("/topic/", "/queue/");
		config.enableSimpleBroker("/topic/", "/queue/");
		config.setApplicationDestinationPrefixes("/app");
	}

	@Override
	public void registerStompEndpoints(StompEndpointRegistry registry) {
		registry.addEndpoint("/tailfilesep").withSockJS();
	}
}

This may seem a little over the top, but what these few lines of configuration does is very powerful and the configuration can be better understood by going through the reference here. In brief, it sets up a websocket endpoint at '/tailfileep' uri, this endpoint is enhanced with SockJS support, Stomp is used as a sub-protocol, endpoints `/topic` and `/queue` is configured to a real broker like RabbitMQ or ActiveMQ but in this specific to an in-memory one.

Going back to the "fileContentRecordingService" once more, this component essentially takes the line of the file and sends it this in-memory broker, SimpMessagingTemplate facilitates this wiring:

public class FileContentRecordingService {
	@Autowired
	private SimpMessagingTemplate simpMessagingTemplate;

	public void sendLinesToTopic(String line) {
		this.simpMessagingTemplate.convertAndSend("/topic/tailfiles", line);
	}
}


Websocket UI configuration

The UI is angularjs based, the client controller is set up this way and internally uses the javascript libraries for sockjs and stomp support:

var tailFilesApp = angular.module("tailFilesApp",[]);

tailFilesApp.controller("TailFilesCtrl", function ($scope) {
    function init() {
        $scope.buffer = new CircularBuffer(20);
    }

    $scope.initSockets = function() {
        $scope.socket={};
        $scope.socket.client = new SockJS("/tailfilesep);
        $scope.socket.stomp = Stomp.over($scope.socket.client);
        $scope.socket.stomp.connect({}, function() {
            $scope.socket.stomp.subscribe("/topic/tailfiles", $scope.notify);
        });
        $scope.socket.client.onclose = $scope.reconnect;
    };

    $scope.notify = function(message) {
        $scope.$apply(function() {
            $scope.buffer.add(angular.fromJson(message.body));
        });
    };

    $scope.reconnect = function() {
        setTimeout($scope.initSockets, 10000);
    };

    init();
    $scope.initSockets();
});

The meat of this code is the "notify" function which the callback acting on the messages from the server, in this instance the new lines coming into the file and showing it in a textarea.


This wraps up the entire application to tail a file. A complete working sample without any external dependencies is available at this github location, instructions to start it up is also available at that location.

Conclusion

Spring Websockets provides a concise way to create Websocket based applications, this sample provides a good demonstration of this support. I had presented on this topic recently at my local JUG (IndyJUG) and a deck with the presentation is available here